Set de joints d'étanchéité Olympus OM1 OM1n OM2 OM2n OM3 OM4 OM10 Ausgeknipst
Set de joints d'étanchéité Olympus OM1 OM1n OM2 OM2n OM3 OM4 OM10 Ausgeknipst
-
-
-
-
-
-
-
-
-
-
-
-
-
-
-
-
-
-
-
-
-
-
-
-
Zustand / Rating
Fotos / Photos
Versand / Shipping
Rückgabe / Returns
DE:
Du findest die Zustandsbeschreibung oberhalb der Artikelbeschreibung.
Wir nutzen standardisierte Tests und Spezialwerkzeuge, um jeden Artikel sorgfältig zu prüfen.
So können wir garantieren, dass alles so funktioniert wie es soll.
Wenn mit dem Artikel etwas nicht stimmt, dann schreiben wir das ausdrücklich in die Zustandsbeschreibung.
EN:
You can find the Condition Rating above the item description.
We use standardized checkup procedures and appropriate tools to thoroughly test every item, so we can guarantee that everything works as intended.
If something is not working properly, we write it clearly in the Condition Rating Tab.
DE:
Wir fotografieren jeden gebrauchten Artikel. So siehst du genau, was du bekommst!
EN:
We photograph every used item, so you can actually see what you get.
DE:
Wir nutzen Europas führende Versanddienstleister DHL und Deutsche Post, um unsere Pakete reibungslos und schnell von Deutschland in die ganze Welt zu verschicken.
Versandtage: Mo/Mi/Fr 16:00
EN:
We use some of Europe's fastest and securest Shipping services DHL and Deutsche Post
to guarantee fast and save shipping from Germany to all over the world.
Shipping Days: Mo/Wd/Fr 16 pm
DE:
Wenn du einmal mit dem erhaltenen Artikel nicht zufrieden bist oder einfach deine Meinung geändert hast, dann kannst du ihn innerhalb von 30 Tagen an uns zurücksenden und wir erstatten dir den vollen Kaufpreis. Ohne Wenn und Aber.
EN:
If you are not satisfied with the items quality or simply changed your mind, you can send us the item back up to 30 days after you received it and get a full refund. No questions asked.
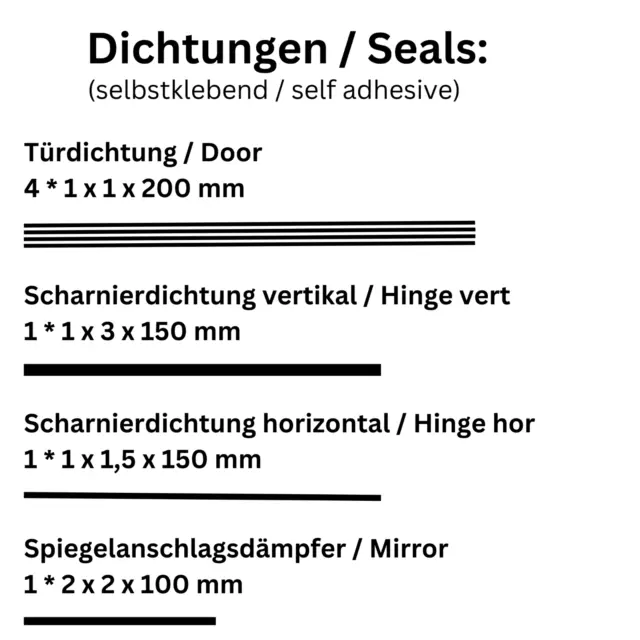
Tap here to read more about Set de joints d'étanchéité Olympus OM1 OM1n OM2 OM2n OM3 OM4 OM10 Ausgeknipst FR : Jeu de joints d'étanchéité universel pour les appareils photo à pellicule. Matériaux inclus : Nouveaux joints d'étanchéité spatule et cure-dents Coton-tiges Matériel supplémentaire nécessaire : Alcool isopropylique ou dissolvant de colle Ciseaux Pince à épiler Petit tournevis plat (facultatif) Colle universelle (facultatif) Instructions : 1. Ouvrez et retirez (si possible) le couvercle arrière de l'appareil photo pour accéder aux anciens joints d'étanchéité. 2. Utilisez un petit tournevis plat ou une spatule pour gratter soigneusement les anciens joints d'étanchéité. Veillez à ne pas rayer ou endommager le boîtier de l'appareil photo ou d'autres pièces. 3. Si les anciens joints d'éclairage sont particulièrement difficiles à retirer, vous pouvez utiliser un dissolvant pour adhésif ou de l'alcool isopropylique pour ramollir l'adhésif. Appliquez le liquide sur les joints à l'aide d'un coton-tige et attendez quelques minutes avant d'essayer de les retirer à nouveau. 4. Nettoyez les zones où les scellés ont été fixés avec de l'alcool isopropylique et un coton-tige. 5. Mesurez la longueur des anciens scellés et coupez les nouveaux scellés à la même longueur à l'aide de ciseaux. 6. Utilisez une pince à épiler pour fixer soigneusement les nouveaux joints d'étanchéité sur le boîtier de l'appareil photo, en veillant à ce qu'ils soient placés au bon endroit. 7. S'il y a des espaces étroits entre les joints (en particulier l'espace à l'arrière), veillez à ce qu'ils ne se tordent pas. Vous pouvez les enfoncer à l'aide de la spatule. 8. Si vous ne parvenez pas à enfoncer les bandes étroites autocollantes dans le joint sans qu'elles ne se tordent, vous pouvez utiliser le fil de laine fourni et les coller à l'aide d'une colle universelle flexible (par exemple, la colle universelle UHU Kraft). 9. Remarque : il est normal que le dos de l'appareil photo soit un peu plus difficile à fermer avec les nouveaux joints. Les nouveaux joints s'ajusteront d'eux-mêmes avec le temps. 10. Remettez le dos de l'appareil photo en place et testez les nouveaux joints d'étanchéité à la lumière en prenant quelques photos d'essai en pleine lumière. Voilà, c'est fait ! Avec un peu de patience et de soin, vous pouvez facilement retirer et remplacer les joints d'étanchéité de votre appareil photo analogique. Tutoriel vidéo (la vidéo suivante illustre le processus, voir en bas de cette description) : EN: Universal Light Seal Set for Film Cameras. Materials included: New light seals spatula and toothpick Cotton swabs Additionally needed: Isopropyl alcohol or glue remover Scissors Tweezers Small flathead screwdriver (optional) All purpose glue (optional) Instructions: 1. Open and remove (if possible) the back cover of the camera to gain access to the old light seals. 2. Use a small flat-blade screwdriver or spatula to carefully scrape off the old light seals. Be careful not to scratch or damage the camera body or other parts. 3. If the old light seals are particularly hard to remove, you can use adhesive remover or isopropyl alcohol to soften the adhesive. Apply the liquid to the seals with a cotton swab and wait a few minutes before trying to remove them again. 4. Clean the areas where the seals were attached with isopropyl alcohol and a cotton swab. 5. Measure the length of the old light seals and cut the new seals to the same length with scissors. 6. Use tweezers to carefully attach the new light seals to the camera body, making sure they are in the right places. 7. If there are narrow gaps between the seals (especially the gap in the back), make sure that they do not twist. You can press them in with the spatula. 8. If you cannot press the narrow self-adhesive sealing strips into the joint without them being twisted, you can use the enclosed woollen string and glue them in place using flexible all-purpose glue (e.g. UHU Kraft All Purpose Glue). 9. Note: It is normal for the back of the camera to be a little harder to close with new seals. The new seals will adjust themselves over time. 10. Replace the camera back cover and test the new light seals by taking a few test shots in bright light. That's it! With a little patience and care, you can easily remove and replace the light seals on your analogue camera.Kamera Lichtdichtungen und Spigelanschlagsdämpfer wechseln / How to Replace Light Seals (ENG SUB)
Video will open in a new window Using the eBay App? Paste link into a browser window:
[isdntekvideo]- Condition: Neuf
- Modèle compatible: voir description ci-dessous
- Marque: Ausgeknipst
- Type: Adaptateurs d'objectif
PicClick Insights - Set de joints d'étanchéité Olympus OM1 OM1n OM2 OM2n OM3 OM4 OM10 Ausgeknipst PicClick Exclusif
- Popularité - 6 vendu, 10 disponibles. 1 personne suit la vente, 0.0 de nouvelles personnes suivent la vente par jour, 303 days for sale on eBay. Nombre normal suivi.
- Meilleur Prix -
- Vendeur - 9.194+ articles vendu. 0.3% évaluations négative. Grand vendeur avec la très bonne rétroaction positive et plus de 50 cotes.
Les Gens ont Aussi Aimé PicClick Exclusif

Set de joints d'étanchéité pour Canon AE-1 A-1 AV-1 AT-1 Ftb EF F1 Ausgeknipst
EUR 16,99 Achat immédiat 27d 19h
Olympus Shoe Type 4 Flash Couverture pour OM-1n OM-2n par Ausgeknipst
EUR 11,99 Achat immédiat 11d 17h
Poignée Action Hand Grip pour Olympus OM-1 OM-1n OM-2 OM-2n par Ausgeknipst
EUR 28,99 Achat immédiat 4d 18h
Olympus OM PC Sync Socket Cap 2x Cover pour OM-1 OM-2 OM-3 OM-4 par Ausgeknipst
EUR 8,99 Achat immédiat 11d 17h
Ausgeknipst Couvercle de boîtier pour Olympus OM-1 /n OM-2 /n OM-4 OM-10 OM-40
EUR 8,99 Achat immédiat 11d 14h
 Delonghi Kit de Joints D'Étanchéité à Lèvre Torique Eabi Eam Eca Esam RéservoirEUR 11,72 Achat immédiat ou Offre directe
Ausgeknipst Set de joints d'étanchéité Minolta X-700 X-500 X-570 X-300
EUR 16,99 Achat immédiat
Set Joint D'Étanchéité Moteur Série Complet Yamaha Yzf-R 125 2008 2009 2010
EUR 124,72 Achat immédiat
Série de Joints Étanchéité Set Fbm Minarelli 3 Vitesses Vitesse Au Man. 30850030
EUR 20,14 Achat immédiat


